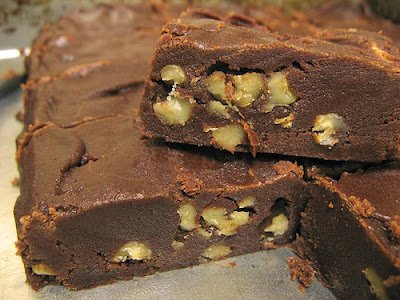
Follow our complete, step-by-step, recipe to learn how to make this super easy, and super delicious chocolate fudge.

Sylvia’s Foolproof Fudge Recipe
There’s a large yellow container with a handle that sits on the top shelf of a rack beside my kitchen. It has the word “PopCorn” written in red on the outside. For some reason, this container became my wife’s Recipe Box many years ago. It was the place she chose to store her recipe cards. Many were handwritten, and some were typed on on old manual typewriter long before computers existed.
While going through the container a few days back, I spotted this recipe she had labeled as Foolproof Fudge. The recipe was handwritten on one of her personalized recipe cards as you can see in the photo below.
My wife was an awesome cook in her own right, but why not? She learned from her mother in her early years, then after we married, she learned even more from my mother.
I met Sylvia when I was 12 and she was just 9 years of age. It was love at first sight on my part but took her a bit longer to come around. We were always friends though, from day one, when we met outside of the new church her father had come to pastor in my town. Yep, she was a PK, a preachers kid. Smile.
I don’t have memories of her making this fudge for us at home, but I suspect she may have a time or two. But, when I saw how simple it was, I decided I should give it a try. Besides, it said it was foolproof, how could I go wrong?
Turns out, it was really good and really rich. It doesn’t take a large piece to cause a sugar rush. Smile. And, while the recipe says it can be left out on the counter once it’s made, I found it got a bit soft so I put it back in the refrigerator and keep it good and cold. It only takes a few minutes out of the fridge and it’s ready to eat.
How about you? Ready to give our recipe a try? Alright then, let’s head on out to the kitchen… and Let’s Get Cooking!
This is a scan of the actual recipe card in Sylvia’s handwriting.
Sylvia’s Foolproof Fudge, you’ll need these ingredients.
The recipe called for three 6oz bags of chocolate chips. Mine were 12 ounce so I used one whole bag and half of another one. Just saying.
Prepare your pan before you begin mixing the ingredients. You’ll need an 8x8inch square pan for this recipe. Line the pan with parchment paper to prevent the fudge from sticking and to make it easier to remove from the pan. Set the pan aside for now.
Place the chocolate chips in a medium sized sauce pot.
Add the can of sweetened condensed milk.
Add the salt.
Place the sauce pot over Medium-Low heat on your stove top. Continue to stir the chips until they are fully melted and combined with the condensed milk. REMOVE FROM HEAT.
Add the chopped nuts to the melted chocolate chips.
Add the vanilla.
Stir everything together until fully combined.
Spread the fudge mixture evenly in the pan.
You now have permission to lick the spoon. Smile.
Garnish the top if desired. I saved just a few of the chocolate chips and the chopped nuts and sprinkled them over the top of the melted chips.
Place the pan in the refrigerator for about two hours, or until the fudge has set.
Flip the pan upside down onto another piece of parchment. It should easily fall out of the pan.
Carefully pull the parchment paper away from the fudge. Flip the entire piece of fudge over and then slice it into small squares or rectangles as desired.
Enjoy!


