Follow our easy, step-by-step, photo illustrated recipe to make this five flavored pound cake. We developed this cake for Southern Flavoring Company of Bedford, Virginia, makers of Happy Home Flavorings. Southern Flavoring Company has been the “secret ingredient” in cakes, pies and all types of desserts since 1929. We’re using five of our favorite flavors for a truly delicious and moist pound cake. Mama used Happy Home Flavoring for years, chances are your mom did too. Printable recipe included.

Southern Flavors Pound Cake Recipe
One of the first companies to reach out to Taste of Southern after we started posting our recipes online, was the Southern Flavoring Company from over in Bedford, Virginia. I was pretty excited when they offered to send me some of their special flavorings to use in my recipes. I was excited that a company had taken note of what we were doing, and excited because I had know of the Happy Home brand of flavorings for many years. Mama used them all the time. What better recommendation can I give them than that?
John Messier sent me a variety of their flavorings, AND he receives our weekly Free Newsletters. As a matter of fact, John has been receiving our Newsletters since December 28, 2012 which just happens to be one month after I first started offering them. How cool is that? Thank You John for your support throughout the years.
I’ve never met John personally, but we’ve traded a good number of Emails. He’s offered to give me the grand tour of the Southern Flavoring Company whenever we get up that way, and I hope to take him up on that offer one day.
A couple of weeks ago, I ordered the five bottles of flavoring you’ll see in the photos below. It was my intention to give them away, and maybe surprise John with a little promotion for his company through Taste of Southern. I placed the order, then I got an Email from John. He told me that he was shipping the flavorings out to me – free of charge – for the giveaway. So much for trying to slip it by him. Thank you again John.
So, having said that, let me give you a little background on my Happy Home Flavoring relationship.
As I said, Mama used these flavorings in her cakes, pies, and cookies when I was a youngster. About twice a year, the little church we attended would offer these flavorings for sale as a fundraiser. Vanilla and Lemon were the two I remember Mama always getting. She kept them in her cabinet for about as long as I can remember.
Southern Flavoring has offered their products to churches and other groups as fundraisers for umpteen years. They also offer 2 year pocket calendars, cards, seasonings, bbq sauces and rubs, extracts, kitchen tools and more. You just need to visit their website and take a look around.
I know I read this somewhere, and I hope I’ve got it right. Southern Flavoring produced an alcohol free Vanilla Flavoring for the churches, since many wouldn’t sell the Vanilla Extracts that are made with alcohol in them. I know that would have been the case at the church I grew up in.
A church had just organized in our little town many years back, and the first pastor assigned to it, later turned out to be my father-in-law. I was 12 and his daughter was 9 when we first met… outside the front door of that same church.
Future father-in-law was eager to start building a church in the community, and I remember we had lots of plate sales, hot dog sales, and all types of things to help raise money. He struggled hard, working full time at another job and trying to pastor the church, to keep that congregation growing.
Years later, my wife would tell me that her father would put a dollar bill in the bottom of the box of flavorings, calendars, or other items that he had her going around the community to try and sell. When she sold all that she had, she got to keep the dollar bill. Mama was usually her first customer as “Sister Gordon” was one of her favorites. I think it was just because she was MY mother, but hey, we’ll save that for later. See, we go way back with the Happy Home brand.
John also contacted me a few months back about coming up with a recipe for his Fall Catalog. I was honored he would even ask, and accepted the challenge. That’s how this Southern Flavors Pound Cake came about. The recipe has been posted on his website for months, and I wanted to do the full step-by-step recipe for you here.
So, you’re probably wondering what a cake with FIVE different flavorings actually ends up tasting like. You’ll have to read on to find that out. I’ll tell you what it reminds me of at the bottom of the post.
We’re also going to give you the opportunity to WIN your very own collection of the five flavors that we’ve used in this recipe… thanks to John and the Southern Flavoring Company. You’ll see how to enter just below.
I do hope you’ll try our Southern Flavors Pound Cake recipe. If you’re ready to get started, let’s get everything together and get in the kitchen. In other words… Let’s Get Cooking!

Southern Flavors Pound Cake: You’ll need these ingredients.

We certainly hope you’ll use these Happy Home Flavorings to make our special pound cake.
Don’t have them? We’re giving away all five (7 ounce) bottles of the flavorings pictured here. We’ll send one lucky reader the very bottles we used to take our photo’s with. No, I didn’t open them, we’ve already got these Happy Home Flavorings and more, in our kitchen. They may have a little flour on the outside though. (Smile)
Southern Flavoring Company has graciously given these to us for the giveaway. Just answer this simple question and you’ll be entered to win.
Question: What’s your favorite cake for dessert?
This giveaway ended at midnight – December 14, 2014.
Happy Home flavorings, and more, can be ordered online direct from their website at: www.southernflavoring.com

Thank You to everyone that entered our giveaway. Thank You also to everyone at Southern Flavoring Company for making this giveaway possible. It was fun to see all the different cakes that everyone enjoys.

To begin making the pound cake, measure out three level cups of All-Purpose Flour into a large mixing bowl.

Add the Baking Powder.

Whisk the flour and baking powder together well, then just set it aside for the moment.
Pre-heat your oven to 325 degrees.

Measure out one cup of Buttermilk into a small mixing bowl.

Add the Happy Home Vanilla Flavoring.

Add the Happy Home Almond Flavoring.

Add the Happy Home Lemon Flavoring.
Are you starting to see a trend here? (Smile) This was one of Mama’s favorites. She bought a bottle or two every time they sold it at church.

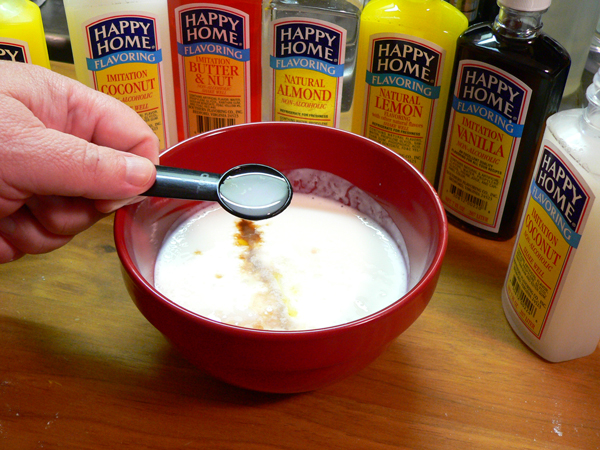
Add the Happy Home Coconut Flavoring.

Add the Happy Home Butter & Nut Flavoring.

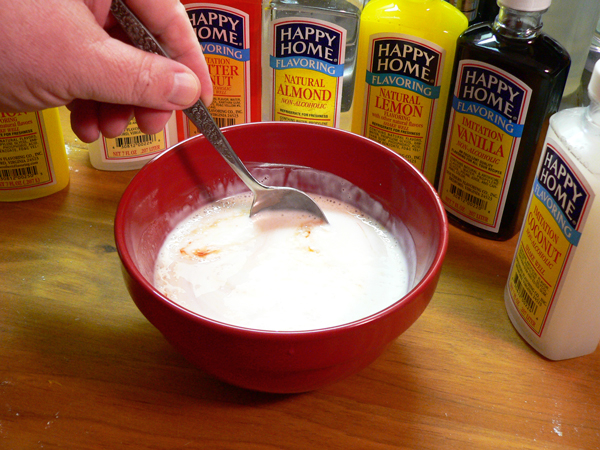
Stir all the flavorings and buttermilk together really good. Set this aside for the moment.

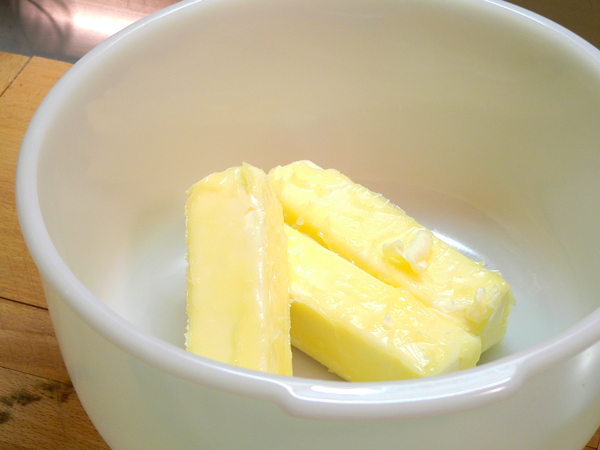
Place the slightly softened butter in a large mixing bowl.
The butter should not be really mushy soft, but at about 70 degrees. It should give a little when picked up, but not so warm that it just gets all mushy and soft. If it gets too soft, it can’t hold the air bubbles it needs to help make the cake light. It’s complicated. Maybe we can go into it deeper one day when you’re not so busy.

Beat the butter on low speed with your mixer, until you see little “tails” trailing off of the beater blades. This was getting a little warmer than it should have.

Add some sugar.
Add the sugar gradually instead of just dumping it all in the bowl at one time. I’m using a hand mixer, and added about 1/2 cup of sugar at a time, then creaming it together before adding more. Continue to add the sugar and mix it together until it’s all creamy and fluffy.

Cream all the butter and sugar together. It should be mixed well, but it will still be a bit grainy and that’s not a problem. Scrape down the sides and the bottom of the bowl, then mix it a few seconds longer until it’s mixed together really good.

Next, add the eggs… ONE at a TIME.
I know it sounds like a bit more work, but don’t try to rush these steps. I always crack the egg into a small bowl just in case any egg shell falls in. I can fish that out easier in a small bowl than after the egg has been added to the batter.
Place the eggs, one at a time, in the batter then mix it on low speed just enough to incorporate it. It will only take a few seconds to do this, so don’t overwork the batter by mixing more.
Repeat the process until all five eggs have been worked into the batter.

Once all the eggs are mixed in, it’s time to start adding some flour and buttermilk.

The flour needs to be worked in gradually as well.
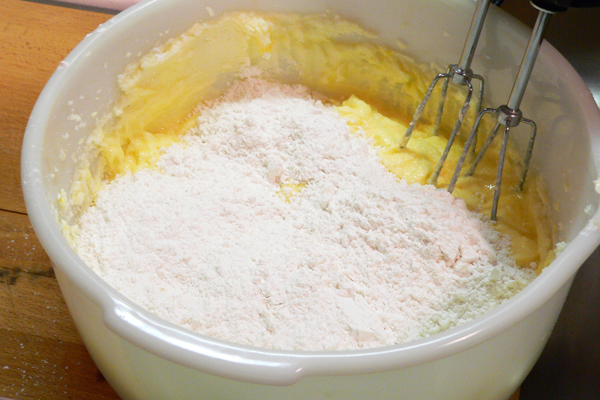
Add about one third of the flour to the batter. Just eyeball it, you don’t have to measure it out.
Sprinkle the flour all around on top of the batter.

Mix this on low speed, just until most of the flour is combined into the batter.

Add about half of the Buttermilk to the batter.

Mix this on low speed again, just until the buttermilk is mixed into the batter.
NOW, repeat the process, adding another one third of the flour, then the rest of the buttermilk, ending with flour as the final addition to the batter. Mix just enough to combine after each addition. Remember, you don’t want to over beat the batter.

Finally, use a spatula to scrape down the sides of the bowl, and stir the batter up from the bottom.

I like to just fold everything together a stroke or two to finish off the mixing process. The batter is now ready for the baking pan.

I’m using a vegetable spray with flour to grease my Bundt pan for baking. Be sure to use one with flour, or you’ll have to add some flour to the pan if it’s not included in the spray can.
Of course, you could just use some shortening or butter to grease the pan as well. If you use one of these, you’ll need to be sure you’ve got your pan coated really well.

A pastry brush works really good in a Bundt pan, to make sure you get in all those tight little crevices. You need a thin coating of grease on all the edges of the pan.
I’m not covering it here, but if you need to add flour, just sprinkle a couple spoonfuls inside the pan. Then, holding the pan over the sink, roll it all around until the flour fully coats the bottom, sides, and in any small crevices with a light coating of flour. Tap the pan a time or two to loosen any clumps of flour that might have formed. Turn the pan upside down and tap the excess flour out. Don’t leave any clumps in the pan, as it will cause gaps in the batter as it bakes.

Spoon the batter into the pan.

Gently spread the batter out evenly inside the pan. Try not to touch the edges, but spread it out the best you can. I try to work it a little up toward the outer edges, and up towards the center tube with less in the middle section of the batter. Most batters will rise in the middle more so than at the edges, but that’s pretty common and nothing to be concerned about it.
Gently tap the pan a time or two on your counter top to help release any air bubbles that might be trapped in the batter.

Place the cake pan on the middle rack of your oven that has been pre-heated to 325 degrees.
Ovens vary, so you’ll need to keep a close watch on the cake. DO NOT OPEN THE OVEN DOOR until after about 45 minutes of baking. Opening the door before the cake has time to rise and firm up some could cause the cake to fall and droop in the middle. After about 45 minutes, it’s baked enough so that you can start watching it and checking to see when it’s done. Your cake may take longer than 65 minutes to bake, but start testing it once the top begins to brown a bit.

Your cake is done when a wooden toothpick or skewer, is inserted into the thickest part of the cake. If the skewer pulls out clean, free of crumbs, the cake is done and should be immediately removed from the oven.

Place the cake on a wire rack or folded towel and let it cool for 15 minutes before removing from the pan.

After 15 minutes, place a plate or another wire rack on top of the cake, then flip it upside down. The cake should freely fall loose from the pan. If it doesn’t, tap the bottom of the pan a time or two to see if that helps. This cake needs to be removed from the pan while it’s still warm, if you wait too long, it might stick to the pan, and you really don’t want that to happen do you?

Enjoy!
OK, I told you’d I’d give you my take on what flavor this cake ends up tasting like. It might just be me, but on the first day or so, I find that the cake has a slight hint of coconut in taste. That seems to go away after the first day or so, and then I taste more of the almond or lemon flavor. Again, it’s just me, you might experience something different. If you try the recipe, I hope you’ll come back and share your results with us in the Comments section below.
Thank you to John and everyone over at Southern Flavoring Company for producing such great products for all these years. I’m honored to have them in my spice rack here at Taste of Southern. Happy Home Flavorings bring back lots of memories for me every time I use them. Hopefully, we’ll get some new readers to enjoying them as well.
Please visit their website, and give some of your favorite flavors a Happy Home try. www.southernflavoring.com


