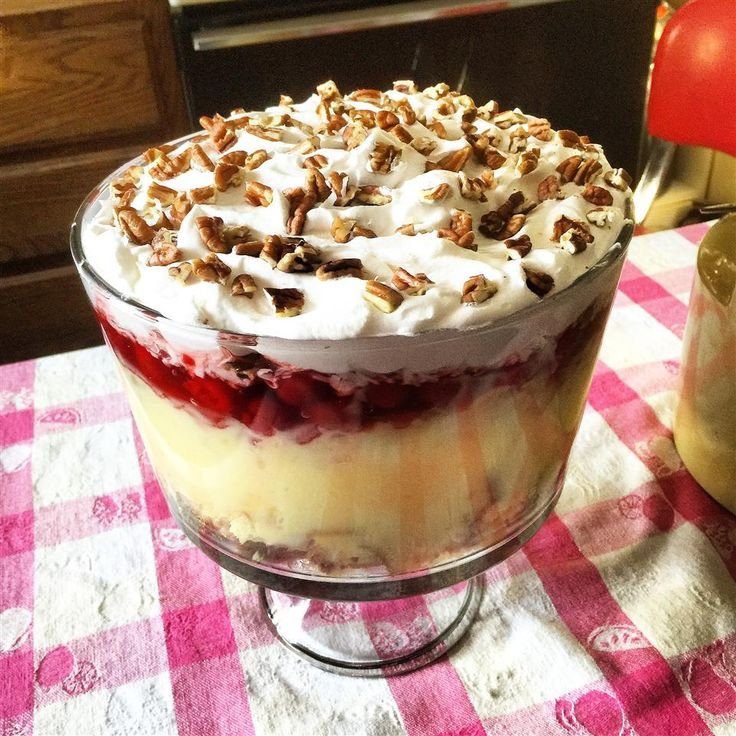
Follow our easy, step-by-step, directions to learn how to make this very delicious Punch Bowl Cake. It’s easy to assemble, and it feeds a crowd.

This is a dessert that is easy to assemble and feeds a large crowd of folks. The recipe is from my cousin Audrey who always made one of these for our family reunions.
My cousin Audrey was a few years older than me. There were three girls and two boys in her family, and we all played together as young kids. It was always a treat to visit their house and we played as hard as we could the entire time.
Sadly, Audrey is no longer with us, but I still have lots of great memories of her, and I’ll never forget that little giggle she often did when she smiled. She always seemed to have a smile,
Later, and with a family of her own, Audrey would attend our annual family reunions. She almost always brought one of these great big punch bowl cakes. It was the biggest dessert on the dessert table most of the time.
During the course of those reunions, the family created the “Stewart Family Favorites Cookbook.” It was just a small cookbook like many churches and other families made, and it was sold as a fundraiser to help cover the cost of renting the building we always used. Audrey’s recipe for the cake is in that cookbook.
I’ve looked at it for a long time, and I’m happy to now share it with you. I hope you enjoy it, and I hope you’ll make one to share at your next large gathering. Audrey would be proud.
Audrey’s sister Agnes, is the one that shared her recipe for Southern Potato Salad that you’ll find here on Taste of Southern. All the girls in the family turned out to be great cooks on their own.
Only the youngest girl in the family, my cousin Carolyn, is still living. We talked on the phone for almost two hours just a few days before I made this cake. Carolyn and I kind of compete against each other in making desserts to take to what we now call our Cousins Reunion. She’s a great cook just like her sisters.
This cake is really simple. And, you can let the kids help you put it all together. I baked my sheet cake the day before I assembled the cake, so that makes assembly go that much faster. Smile.
So, if you’re ready to try it, let’s head on out to the kitchen, and… Let’s Get Cooking.
Punch Bowl Cake Recipe – You’ll need these ingredients.
First thing you will need to do is to prepare the sheet cake. You can do this a day or two ahead of time which really helps when you get ready to assemble the cake. Just follow the directions on the box to prepare your cake. It’s best to let the cake cool completely before using it to make our cake.
When you’re ready to start putting the cake together, start by making the Vanilla Pudding. Again, just follow the directions on the package, prepare the pudding, and let it setup while you begin assembly of the cake.
Cut your sheet cake in half. Crumble half the cake into the bottom of your punch bowl.
DRAIN the cans of pineapple, then spread one entire can over the cake. Save the juice. It’s good.
Spread HALF of the can of Cherry Pie Filling over the top of the pineapple.
Spread HALF of the Vanilla Pudding over the top of the cherries.
Spread HALF of the Cool Whip® over the top of the pudding.
Spread HALF of the sweetened flake coconut over the top of the Cool Whip® Topping.
Pecans are optional, but if you’re using them, sprinkle them on next.
Crumble up the other half of the cake, and spread it out over the top of the other layers.
From here, we just REPEAT THE LAYERS.
Add the other can of pineapple, the rest of the cherry pie filling, the rest of the vanilla pudding, the remaining Cool Whip®, coconut and pecans.
Garnish the top as desired. I reserved just a few of the cherries and placed them on top along with some more pecans.
Refrigerate the cake for an hour or two prior to serving, or overnight if possible. I think it’s better when it’s cold, but that’s just me. Smile.
Here’s a little closeup of the side of the bowl so you can see the layers. Since the cherries really stand out, be sure to spread some of them around the outer edge of the bowl when you put down that first layer.
Enjoy!


